Introduction
Shortcut Keys are often mentioned, Be it Video Games, Browsers, Your average day-to-day applications such as MS Word and Notepad and Even your IDE, navigating a simple menu is easy enough, but what about the case when the menu is too much cluttered or overwhelming for the user? What about saving time? The solution is the aforementioned implementation of Shortcut Keys
Outline
- How To Capture Keystrokes / Implement Shortcut Keys
- Adding a keyboard shortcut to Winforms App
- Dealing With Multiple Keystrokes At The Same Time
- Useful Scenarios
Prerequisites
- Microsoft Visual Studio
- .NET Desktop Development Tools For Visual Studio
- A Windows Forms Application
How To Capture Keystrokes / Implement Shortcut Keys
Right-Click the Form you want to implement the shortcuts for and click “View Code”.
Now that you have navigated to the backend of your form, add these lines of code at the bottom of the file
This is the function you will be using to capture keystrokes, To learn more refer to the Official Microsoft Documentation
        protected override bool ProcessCmdKey(ref Message msg, Keys keydata)
        {

        }
Adding a Keyboard Shortcut To Winforms App
Now that we have a mechanism to capture keystrokes now is the time to add our first shortcut key
Copy and paste the following code snippet in the scope of your form
        protected override bool ProcessCmdKey(ref Message msg, Keys keyData)
        {
            // For Two Keys
            if (keyData == (Keys.A))
            {
                MessageBox.Show("User Pressed the A key");
                return true;
            }

                return base.ProcessCmdKey(ref msg, keyData);
        }

Dealing With Multiple Keystrokes At The Same Time
Alright so up to this point we know how to capture keystrokes and adding a single shortcut key, but what about multiple keys? It is really simple you just have to employ the “Pipe Operator” to check for as many keys as you want
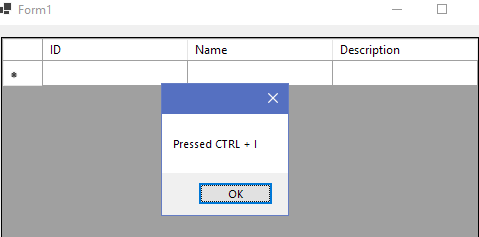
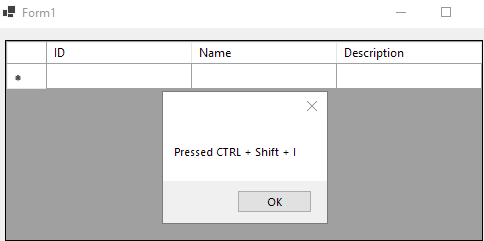
For example, Suppose you want to check for (CTRL + I) and (CTRL + SHIFT + I), This is how you do it
       protected override bool ProcessCmdKey(ref Message msg, Keys keyData)
        {
            // For Two Keys
            if (keyData == (Keys.Control | Keys.I))
            {
                MessageBox.Show("Pressed CTRL + I");
                return true;
            }

            // For Three Keys
            if (keyData == (Keys.Control | Keys.Shift | Keys.I))
            {
                MessageBox.Show("Pressed CTRL + Shift + I");
                return true;
            }

            return base.ProcessCmdKey(ref msg, keyData);
        }
After pressing CTRL + I

After pressing CTRL + SHIFT + I

Just like that, we can add as many keys as we need
Useful Scenarios
There are many use cases where shortcut keys can come in handy but just for the sake of ease let us take a look at a few simple examples
- (CTRL + I) to add a new row to the DataGridView
- (CTRL + D) to delete a row from DataGridView
- (CTRL + S) to save changes in your form
- (CTRL + N) to open a new form
Conclusion
In this tutorial, we learned how to capture Keystrokes and how to add our own shortcut keys to not only provide ease of use but also to save time,
For more content like this, Visit: C# Archives